REST API (OAuth 2.0) Credentials
API authentication varies by service. In general, our latest APIs authenticate and authorize requests through OAuth 2.0 credentials. Specifically, OAuth 2.0 credentials are required for the following service
| Service | Root Scope |
|---|---|
|
sec.cps.certificates |
|
|
ec.analytics.rtap.reports |
|
|
ec.rtld |
|
|
ec.rules |
|
|
cdn.origins |
Create separate API clients for each unique application that leverages
Use a static REST API token to authorize requests for all other CDN-specific API endpoints.
Learn more.
Quick Start
Get started with our latest APIs by performing the following steps:
- Create an API client for the desired application. Authorize this client by only assigning it the scope(s) required by the endpoint(s) with which it will interact.
-
Use this client's ID and secret key to generate a temporary access token.
-
Authorize your API requests using the temporary access token generated in the previous step.
Tenants
A tenant identifies your company or organization. Customers are assigned a single tenant. This tenant contains all of your REST API (OAuth 2.0) client credentials.
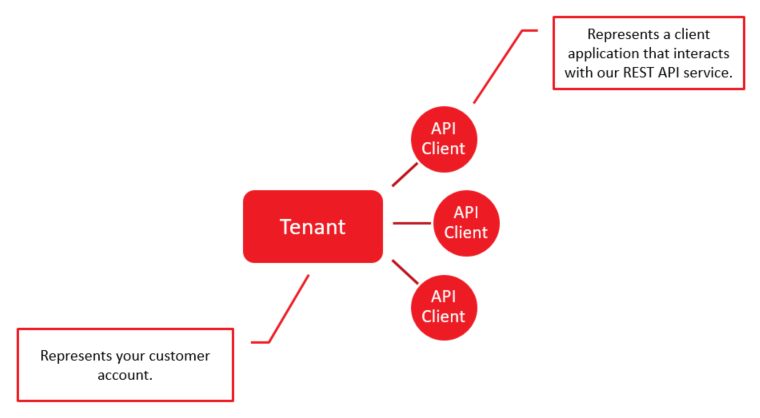
REST API (OAuth 2.0) Clients
You may add REST API (OAuth 2.0) client(s) to your tenant. Use an API client to generate credentials through which you may authorize your application to interact with one or more service(s).
A security best practice is to generate separate API clients for each unique application that will interact with our REST API service.
Use the following elements from your API client to generate credentials:
- Client ID: Identifies an API client by its system-defined ID. View a client's ID from the client's Settings tab.
-
Secret Key: A client must pass this private key for identity verification when requesting an access token. View a client's secret key(s) from the client's Client Secrets tab.
If you suspect that a secret key has been compromised, then you should immediately create a new secret key, update your client to use the new secret key, and then delete the old secret key.
- Scopes: Identifies the set of actions that a client is authorized to perform. View a client's scopes from the client's APIs tab.
Learn more about generating an access token.
Scopes
A scope authorizes an API client to perform specific actions (e.g., create and retrieve configurations). A scope is defined using the following hierarchy:
The above hierarchy allows you to grant broad or narrow permissions to your client. Each element in this hierarchy is described below.
-
Namespace: Identifies a broad category (i.e., ).
-
Service: Identifies a product or a category of products (e.g., , , and ).
A scope may identify a product or a category of products through multiple services.
Example:
Both and identify services in the following scope: ). -
Type: Optional. Identifies a feature or a type of permission.
Example:
In the following scope, identifies a type of permission. In this case, grants permissions to retrieve, submit, and delete deploy requests.
ec.rules.deploy -
Modifier: Optional. Restricts the scope to a subset of permissions. Valid values are:
- create: Restricts the scope to the creation of a resource.
- edit: Restricts the scope to the creation, retrieval, and modification of a resource. It does not authorize the deletion of resources.
- delete: Restricts the scope to the deletion of a resource.
- read: Restricts the scope to the retrieval of a resource.
Example:
The modifier in the following scope authorizes the retrieval of deploy requests:
ec.rules.deploy:read
Key information:
- A security best practice is to only grant the set of scope(s) required for the automation task(s) that the client will perform.
-
A broad scope grants all of the scopes underneath it.
Example:
The following scope authorizes full access to Rules Engine:
ec.rulesAlternatively, the following scope authorizes the creation, retrieval, modification, and deletion of Rules Engine drafts and policies:
ec.rules.policy -
One or more scope(s) must also be defined when requesting an access token. You may only specify a scope that has been explicitly granted or inherited from a broader scope.
Administering API Clients
You can create, modify, and delete API clients.
The recommended approach for switching to a new secret key is to create a secret key, update your API client to use the new secret key, and then delete the old secret key.
To create an account for an API client
- Navigate to the Identity dashboard.
- Click Clients from the side navigation pane.
- Verify that the Assigned to Tenant option is set to your customer account.
- Click Create New Client.
- In the Name option, assign a name that describes this API client.
-
In the Permissions section, mark each scope that will be assigned to the API client.
A security best practice is to only grant the set of scope(s) required for the automation task(s) that the client will perform.
- Click Create.
A Quick Start page is shown upon creating an account for your API client. This page contains a sample curl request and response for an access token. It also provides a sample curl request to our REST API service.
To modify an API client's account
- Navigate to the Identity dashboard.
- Click Clients from the side navigation pane.
- Verify that the Assigned to Tenant option is set to your customer account.
- Click on
 corresponding to the desired account.
 -
Perform one or more of the following tasks:
-
Update Name/Description
- Click the Settings tab.
- In the Name option, modify the account's name.
- In the Description option, describe the account's purpose.
- Click Save.
-
Update Access Token Duration
- Click the Settings tab.
- In the JWT Expiration in Seconds option, determine the number of seconds that an access token will remain valid after being issued.
- Click Save.
-
View Your Client ID
- Click the Settings tab.
- Find the Client ID option.
-
Add a Secret Key
- Click the Client Secrets tab.
- Click New Secret Key.
- In the Name option, assign a name to the new secret key.
- Click Create.
-
View or Copy a Secret Key
- Click the Client Secrets tab.
- Identify the secret key that you would like to view or copy.
-
Click either of the following icons:
-
 : Displays the secret key.
 -
 : Copies the secret key.
-
-
Delete a Secret Key
The recommended approach for switching to a new secret key is to create a secret key, update your API client to use the new secret key, and then delete the old secret key.
- Click the Client Secrets tab.
- Identify the secret key that you would like to delete. Verify that it is no longer being used by your API client or script.
- Click
 next to the secret key identified in the previous step.
 - Click I understand, please delete the client secret to confirm the deletion of the secret key.
-
Update Scopes
- Click the APIs tab.
- Mark each scope that will be granted to the client.
- Clear each scope that will be revoked from the client.
- Click Save.
-
To delete an API client's account
Verify that an API client is no longer in use prior to deletion. Account deletion cannot be undone.
- Navigate to the Identity dashboard.
- Click Clients from the side navigation pane.
- Verify that the Assigned to Tenant option is set to your customer account.
- Click on the desired account.
- Click the Settings tab.
- Click Delete Client.
- Click I understand, please delete the client to confirm the deletion of the API client.